Installing Symfony on cPanel Shared Hosting
Symfony is an open source PHP framework that can help you develop your new website quickly and easily. Security, configurability, and community lie at the foundation of Symfony and we highly recommend the framework to any PHP developer that wants to create a new website or remake an established website. Symfony, however, can be difficult to install on a shared hosting account. Our shared hosting service provides all the tools necessary to make installation of Symfony a breeze and this article will walk you through the entire process.

What you will need:
- A cPanel shared hosting account with SSH access and git installed. All of our super fast LiteSpeed-powered shared hosting services include SSH access.
- An SSH client and familiarity with entering commands. Check out our SSH tutorial if you are new to Linux or the console.
- Some familiarity with the git tool is recommended, though not required to follow along with this tutorial. We have a Git tutorial if you want to learn more.
- This article assumes all requirements are met by your current hosting environment.
Symfony is a PHP framework, so some experience with PHP or the desire to learn PHP is required to work with Symfony. Make sure to bookmark the excellent Symfony Documentation on the Symfony website. It may seem that getting up and running with Symfony will be a daunting task. We'll break it down into simple steps so you can start developing with Symfony right away.
1. Login to SSH
We will be performing most of our installation via SSH (command line). If you are using GeekStorage shared hosting, your account will already have SSH access enabled. If you are using another service provider, you may need to check with them to ensure SSH is enabled for your account. Use your SSH client to login to your shared hosting account; once logged in you are ready to proceed.
2. Install Composer PHP Dependency Manager
Composer is an integral component to the installation of Symfony, and so we will need to install Composer first. Composer can be installed with a single command, entered into your SSH client:
export COMPOSERDIR=~/bin;mkdir bin
curl -sS https://getcomposer.org/installer | php -- --install-dir=$COMPOSERDIR --filename=composer
This command will install composer at /home/username/bin/composer and you will be able to confirm it is installed and working by running the command:
~/bin/composer
Now that Composer is installed, we can continue to the installation of Symfony.
3. Install Symfony
Since we are going to be developing with Symfony, we don't want it to be installed in our public site folder just yet. This can be complicated to configure, but we'll walk through all the necessary steps so everything works properly. If you prefer a simpler configuration, just install Symfony onto a subdomain or your primary site folder. In this case, we're going to install Symfony to a subfolder so we can develop without interfering with our already installed website.
For this tutorial, we're going to install Symfony into the 'symfony' subfolder of our account. To do this is very simple, just enter the following commands into shell (adjust the INSTALLDIR setting during installation if you prefer to install Symfony to a different folder):
export INSTALLDIR=~/public_html/symfony
mkdir $INSTALLDIR
~/bin/composer create-project symfony/framework-standard-edition $INSTALLDIR
The last command may take some time to complete as it downloads all of the necessary components for Symfony. It will ask a few questions during installation, but none are required to get started. We do recommend installing the Acme demo bundle, when asked, if you are new to Symfony. The Acme demo bundle provides an example of how your own code will be implemented into the Symfony framework.
Your database information will also be requested, but it is not necessary to provide the details at this time. You can always edit the Symfony configuration files to change these values at a later time, and the MySQL database is not used for the initial Symfony demo site and testing.
3. Finishing Touches
At this point the Symfony framework has been installed, but to ensure it works we will need to setup an appropriate .htaccess file in the hosted directory. This step makes Symfony URLs forward to the proper script when accessed; without this step we would see problems accessing most pages setup in our Symfony installation. We also need to reset all file permissions so we are not permitting write access to files that do not require it.
find $INSTALLDIR/ -type f -exec chmod 644 {} \;
find $INSTALLDIR/ -type d -exec chmod 755 {} \;
wget -O $INSTALLDIR/.htaccess https://www.geekstorage.com/downloads/symfony.txt
The .htaccess file we have prepared will setup Symfony in development mode. In this mode you will be able to more easily track down programming errors and you can work with the robust Symfony Toolbar that helps hunt down nearly every problem you might encounter when developing. This mode restricts access to specific IPs, however, so we need to update the development page to allow us access. To whitelist our access IP, we need to edit the app_dev.php file in our preferred text editor:
vi $INSTALLDIR/web/app_dev.php
# OR
nano $INSTALLDIR/web/app_dev.php
In this file, look for the 'if' statement where $_SERVER['REMOTE_ADDR'] is specified. It will look something like this:
if (isset($_SERVER['HTTP_CLIENT_IP'])
    || isset($_SERVER['HTTP_X_FORWARDED_FOR'])
    || !(in_array(@$_SERVER['REMOTE_ADDR'], array('127.0.0.1', 'fe80::1', '::1')) || php_sapi_name() === 'cli-server')
) {
    header('HTTP/1.0 403 Forbidden');
    exit('You are not allowed to access this file. Check '.basename(__FILE__).' for more information.');
}
We need to change the array portion to include our own IP address. We found our IP at our IP checker and added it to the array like so:
if (isset($_SERVER['HTTP_CLIENT_IP'])
    || isset($_SERVER['HTTP_X_FORWARDED_FOR'])
    || !(in_array(@$_SERVER['REMOTE_ADDR'], array('127.0.0.1', 'fe80::1', '::1', '162.249.125.21')) || php_sapi_name() === 'cli-server')
) {
    header('HTTP/1.0 403 Forbidden');
    exit('You are not allowed to access this file. Check '.basename(__FILE__).' for more information.');
}
Finally, Symfony will need to be configured to work in the subfolder we have setup (in this case, the symfony subfolder). To do this, we need to prefix all routes with /symfony in the appropriate routing configuration files. To do this, we can run the following commands:
echo '    prefix: /symfony' >> $INSTALLDIR/app/config/routing.yml
sed -i.bak 's/\/_/\/symfony\/_/g' $INSTALLDIR/app/config/routing_dev.yml
# Run the following command only if you chose to include the Acme demo bundle during installation
echo '    prefix: /symfony' >> $INSTALLDIR/app/config/routing_dev.yml
Finally, we need to edit the configuration file to ensure assets are loaded properly when operating in our symfony subfolder. To do this we have to adjust the templating section of the config.yml file:
vi $INSTALLDIR/app/config/config.yml
# OR
nano $INSTALLDIR/app/config/config.yml
# Look for this line:
    templating:
        engines: ['twig']
# Below the engines line, add the following:
        assets_base_urls:
            http: [/symfony/web]
            ssl:  [/symfony/web]
# Save and quit.
Now we should be able to load up our Symfony website by visiting the symfony subfolder of our domain:
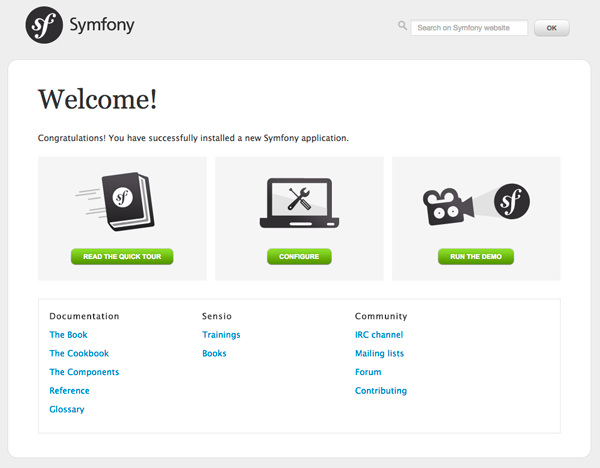
You are now ready to begin developing with Symfony! We highly recommend following the Symfony Getting Started guide by picking up at the Understanding the Fundamentals section to continue with your new Symfony site.
4. Common Tasks
There are a number of common tasks that you will perform with Symfony: running updates, using the console, and security checks.
To update your Symfony components to the latest version, first change directories to your symfony folder and then run the following command:
~/bin/composer update
To view more about the Symfony console, change to your symfony directory and run this command:
php app/console
To install and run a security scan on your installed Symfony components and all included Composer packages (replace the symfony subfolder with your installed directory):
wget -O ~/bin/security-checker http://get.sensiolabs.org/security-checker.phar
php ~/bin/security-checker security:check ~/public_html/symfony/composer.lock
Enjoy developing with Symfony!
Our team uses Symfony for a number of internal projects, as well as our active website, and we hope you enjoy working with it as much as we do.