This article will walk you through generating an SSH Key, and using the SSH Key with your preferred SSH program.
For Mac & Linux
Generating an SSH Key via cPanel
For this article we will be using cPanel to generate our SSH Key. SSH provides a very easy interface for generating, importing, and managing your SSH Keys. SSH Keys offer you an added layer of protection for your SSH login, and can even be required for your SSH access if desired.
To generate an SSH Key via cPanel, first you will need to be logged in to cPanel at http://yourdomain.com/cpanel - Once logged in, type "SSH" in the upper left "Find" box. You will then see "SSH/Shell Access" as the only available icon in the right hand area of cPanel. Click the SSH/Shell Access icon to proceed.
On this page, select "Manage SSH Keys" to begin managing your SSH Keys.
On the Manage SSH Keys page, select "Generate a New Key" to begin. You will see a form like the following:
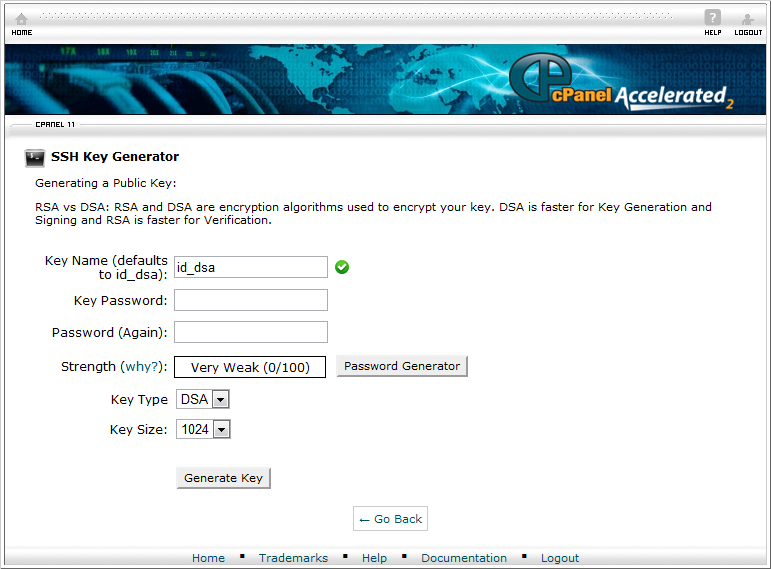
We recommend changing the first field to match something identifiable for you, such as "workpc" or "my-laptop" so that you know where your key will be used. For your password, we recommend encrypting your key with a strong password. You also have the option to leave these fields blank for a password-less entry, if you prefer. For the remaining settings, the default settings can be used. Note that DSA can not be used with a higher key size than 1024. Once ready, click Generate Key to proceed.
Download & Install Your Key (Mac & Linux)
First, grab your SSH Private Key contents. From the Manage SSH Keys page, select "View/Download" under the Private Keys listing, next to your new key. Next, on your local system, create (if it doesn't already exist) a folder named ".ssh" in your user directory. For example with the command "mkdir ~/.ssh" - Next, place the contents of your SSH key in to a file with the same name as the SSH key. For example, if you used the default setting of "id_dsa", your SSH Private Key should be stored in ~/.ssh/id_dsa
Authorize Your Key
The last step is to authorize your SSH Key. Go back to the Manage SSH Keys page. Under "Public Keys" where your key is listed, select "Manage Authorization" to proceed. On the next page, click "Authorize" to finalize authorization of your key.
Done!
You're done! Just login to SSH as usual and you should automatically make use of the key installed on your local system.
For Windows (PuTTY)
Generating an SSH Key for PuTTY
For Windows users with PuTTY, we can use the PuTTYGen tool available at http://the.earth.li/~sgtatham/putty/latest/x86/puttygen.exe to generate our private key. Load up this application, and you should see a screen like this:
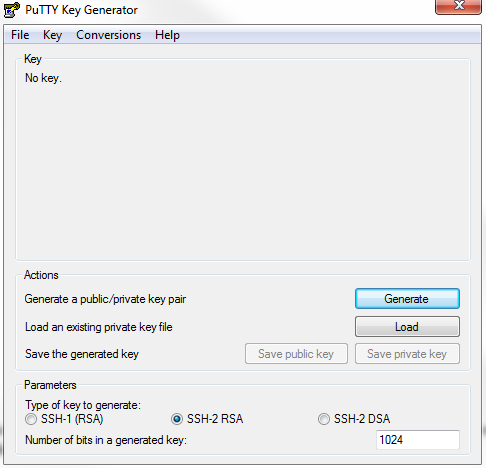
On this screen, click the "Generate" button to begin the key generation. It will request you move your mouse around in the blank area for a short time to generate "randomness" for the application. Once completed, you should see a screen like this one:

Enter your preferred comment for the comment section, we recommend using something familiar to you, such as "workpc" or "mylaptop" to identify the key. Enter a passphrase if desired, for an additional layer of authentication security. Next, click "Save private key" and place the file somewhere you will remember for later reference. It is recommended not to save the public key with your local computer. You will want to copy the contents of the top box of the screen, beginning with "ssh-rsa" all the way through the last line of the box.
Authorizing Public Key via cPanel
Next, we will need to authorize our public key via cPanel. The contents of the top PuTTYGen box will need to be copied for this process. Next, login to cPanel and enter "SSH" in to the "Find" box in the top left. You should now see the "SSH/Shell Access" icon, click it to proceed.
On this page, click "Manage SSH Keys" to manage your public and private SSH keys. You will next need to select "Import Key" near the top of the page. You will see a page like this:
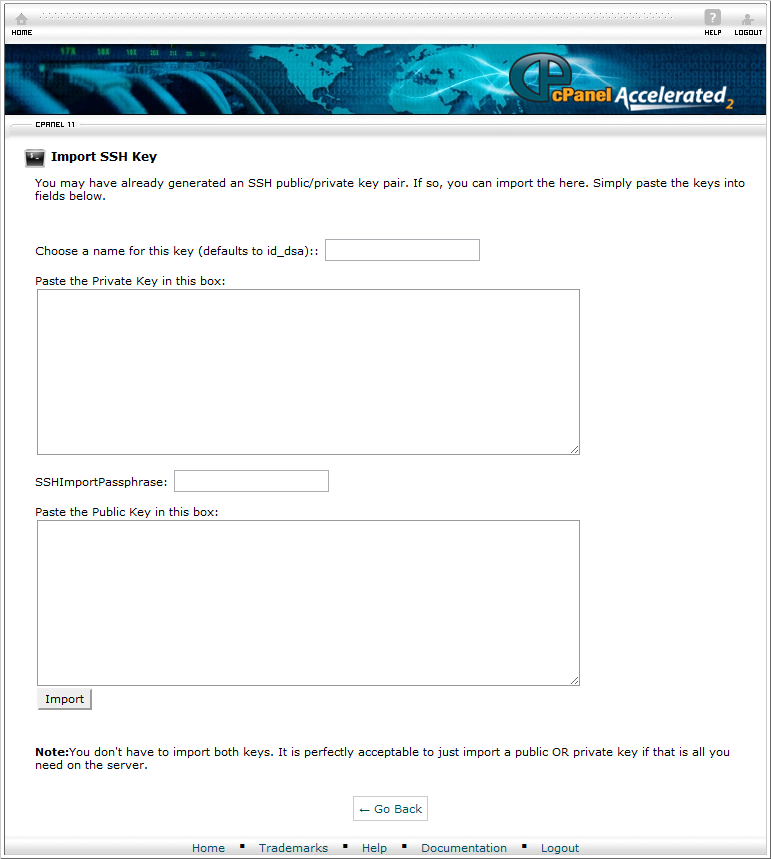
You should only need to place your public key contents in to the Public Key box (the lower box), and click Import. No other fields are required for this process. We're almost done now!
Next, on the Manage SSH Keys page, click Manage Authorization next to your newly imported key (name defaults to id_dsa). On this page select "Authorize", and your key is ready to use with the server.
Configure PuTTY
For this process, we will create a Saved Session in PuTTY for connecting with our new key. Open up PuTTY (available at http://www.chiark.greenend.org.uk/~sgtatham/putty/), you should see a screen like this one:
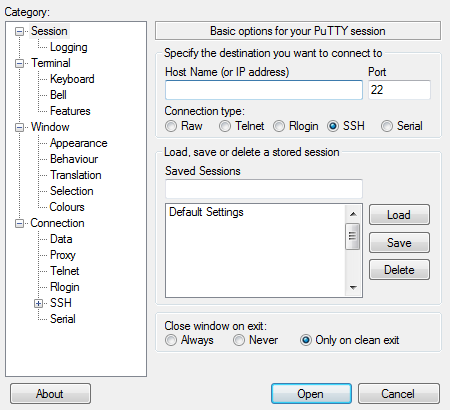
In the Host Name field, enter your SSH hostname, select SSH for Connection Type. Next, expand "SSH" in the left menu, and then select "Auth" from the expanded contents. You will be presented with a screen like this:

Click the "Browse" button, find your previously saved Private Key file, and select it. Next, we recommend entering your Auto-login username under the "Data" options in PuTTY.
Finally, go back to the Session (primary) screen of PuTTY and enter a name for your session, such as "MySSH", and click Save.
Double cilck "MySSH" in the list any time you want to connect with your new SSH Key!
Limit SSH Access to Key OnlyIf you would like to limit all SSH Access by requiring an authorized key to permit entry (i.e., disallowing password only access), raise a ticket to our tech support team and we can update the server configuration for your account as needed.
Have any questions?
If you have any questions or need assistance, please contact Geek Support.
Your comments can help make Geek Knowledge better for everyone. Please take a few moments to comment on this article if you found it helpful or feel it needs improvement. Registration is not necessary.
 Categories